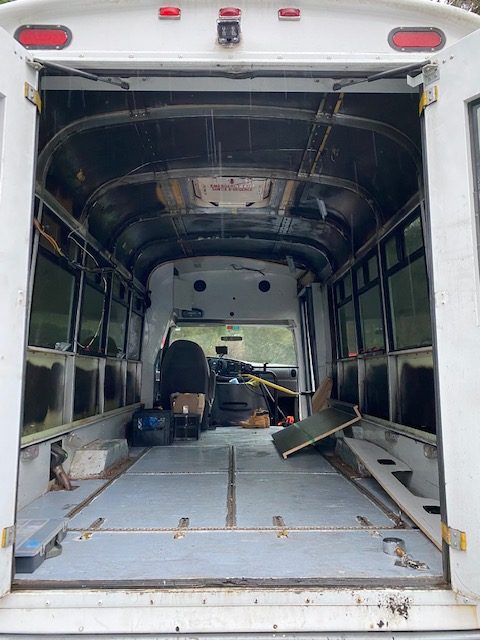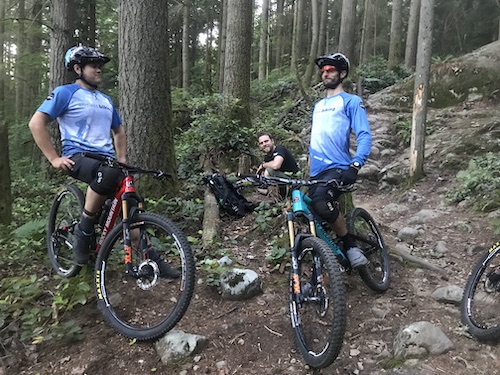
2020 was looking like a pretty awesome year as far as biking goes. A decent amount of big points races at good venues, lots of new bike tech, and my continuing progression of speed and fitness. This whole pandemic has thrown a huge wrench in those plans and goals, and the only race that hasn’t been canceled is the EWS in Whistler. I am very close to throwing in the towel for this season and taking the year off from international/national series racing to improve my skills and have more fun on the bike. That being said, I already have my 2020 bikes built up and ready for the season, so I might as well share some tech and some of the setup that I do on my bikes for racing!
For 2020, I have been incredibly fortunate to be able to build up 2 new bikes for my Enduro racing ventures. This wouldn’t be even remotely possible without Endless Biking, the company I’ve been working for for 4 years, and my title sponsor. Both of these bikes would be pushing the $10,000 retail cost for the average consumer, and I am so thankful to be in the sponsorships and the situation that I am in where I am able to ride both of these truly amazing machines.
2018/19 BC Instinct
For some background, I’ve been riding the Rocky Mountain Instinct BC Edition for the past 2 and a half years. The bike was designed to be ridden with a 160mm fork with 155mm of rear travel. Within a couple of months, I found that a 170mm fork was better suited for my riding style and for the races I was competing in so for most of the duration that I was riding that bike, I had it setup 170/155mm travel. I did experiment with a shorter shock in the rear which brought it to 140mm of travel. While I felt like I was going faster because of less travel and geometry change, I was in reality going slower. I primarily ran the bike with a 170mm Fox 36 and a 8.5×2.5 (155mm rear travel) Float DHX2 shock.
Midway through 2019, there was talk of a revamped Slayer. I had owned a Slayer in 2017, and while it was a very capable bike, It wasn’t the best for racing. The new Slayer was first shown at Crankworx and the specs and geometry looked promising to be competitive on the Enduro race circuit. A little bit later we had to submit our bike orders for the 2020 season. Because of a change in our sponsorship agreements, I ended up ordering 2 bikes. I went with the new Slayer, and an Instinct Frame. My reasoning was that if the Slayer for some reason wasn’t that good of a race bike, I sell it easily and still have a new Instinct to fall back on, which I had already been riding for 2 seasons and was comfortable on.
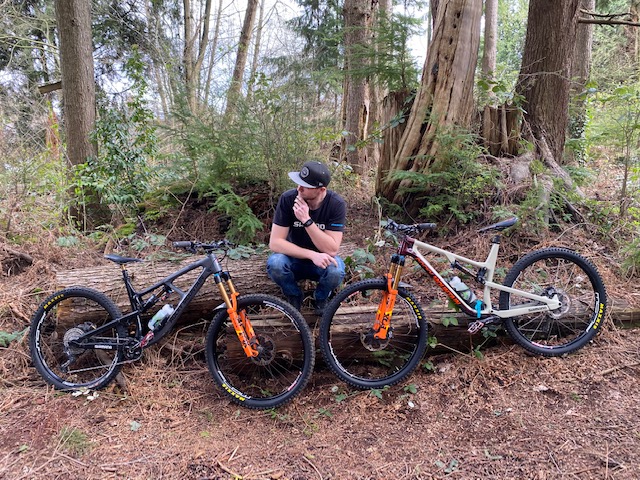
As it turns out, they’re both really amazing bikes in different ways. So enough talking, here are the bikes and some explanation of how and why I’ve set them up the way that I have.
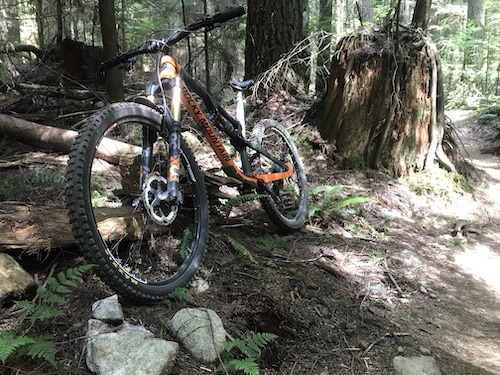
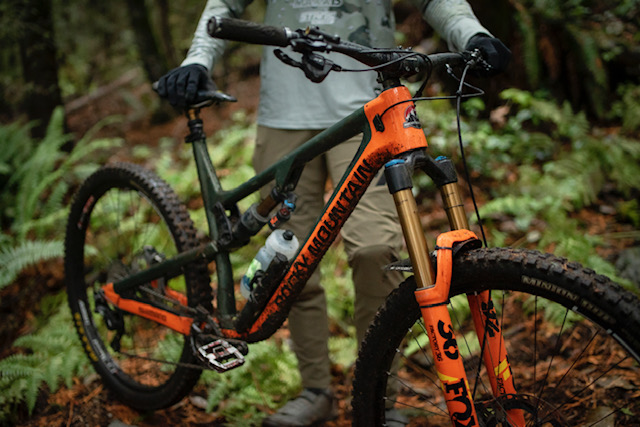
XL Slayer 29:
Frame: XL Slayer Carbon
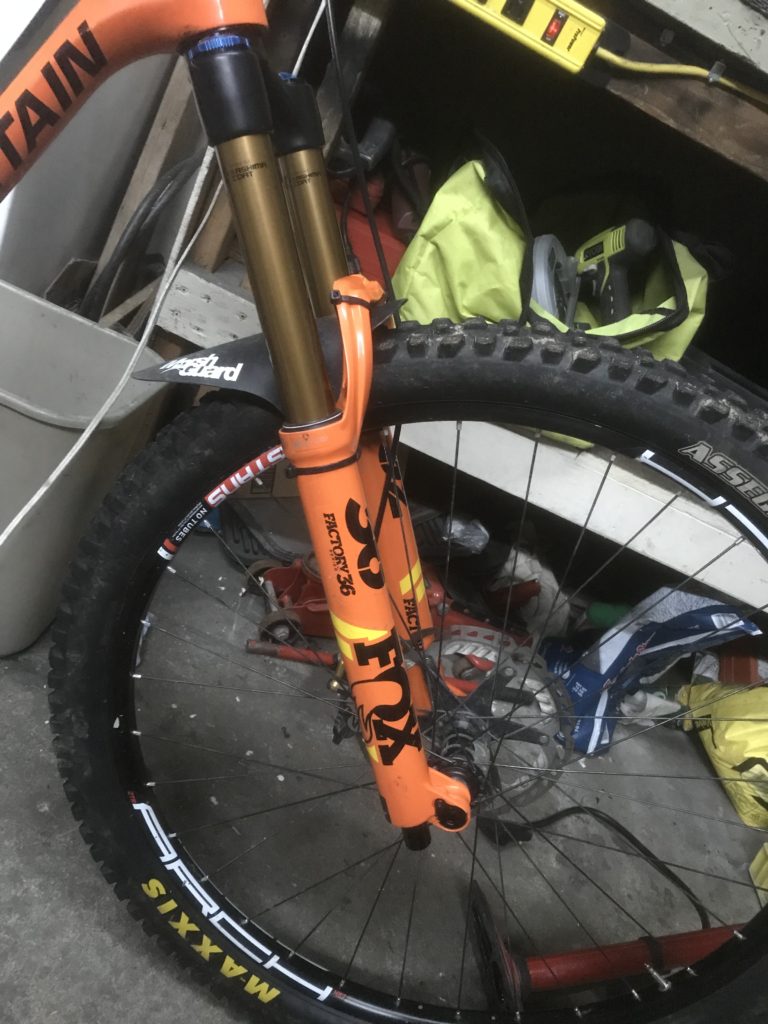
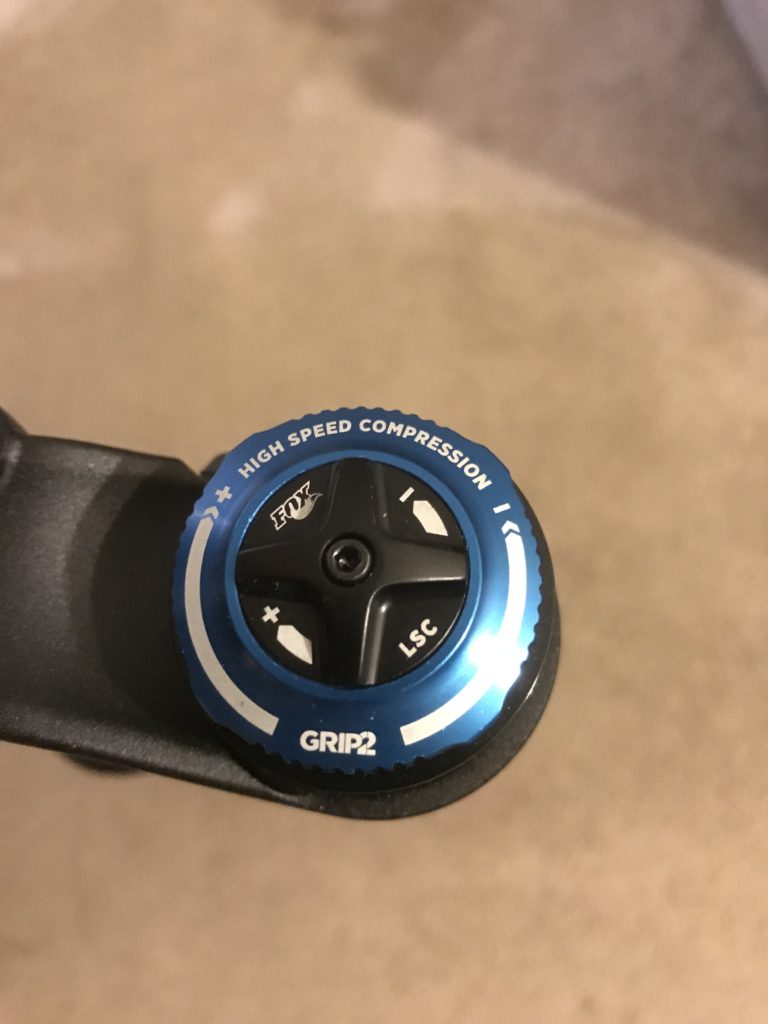
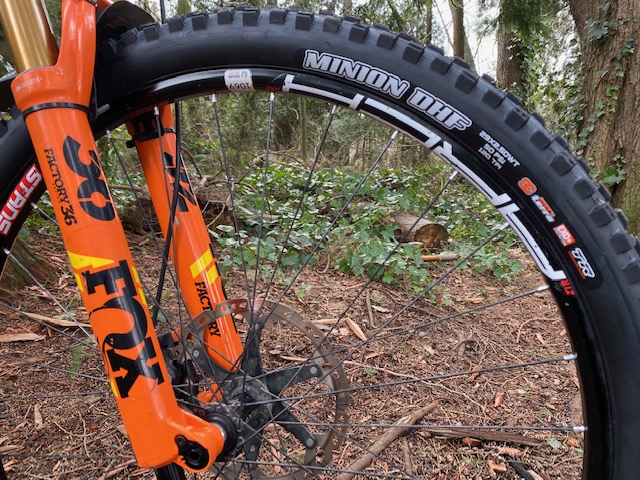
Fork: Fox 36 Grip2 170mm 44mm Rake
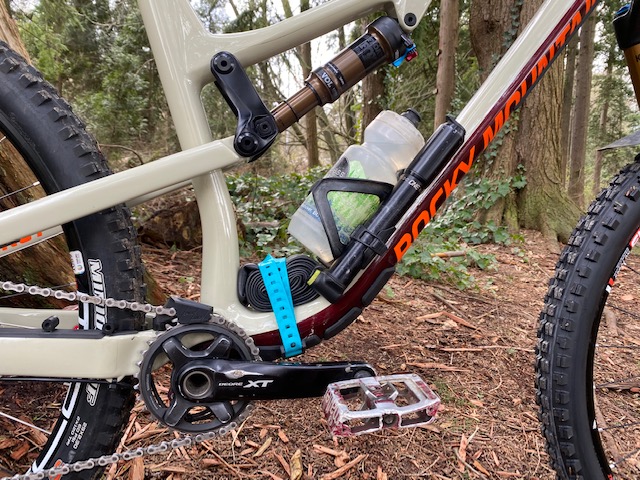
Shock: Fox Float x2
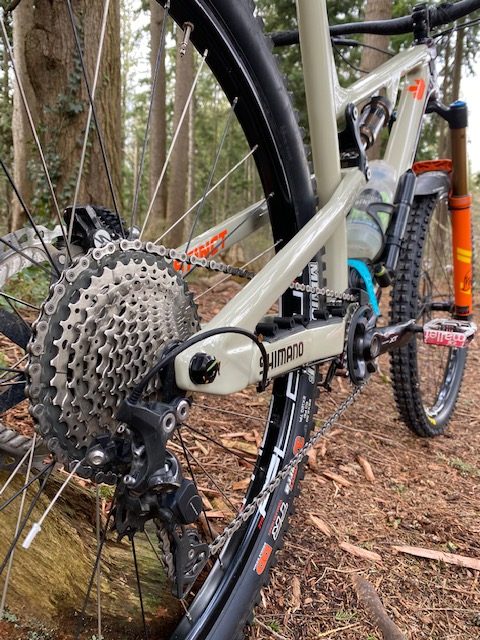
Drivetrain: Shimano 11spd XT Cranks with Wolftooth 12 speed 34T chainring, 10-51 SLX Cassette, 12spd XT Derailleur/shifter, 12 speed XTR Chain
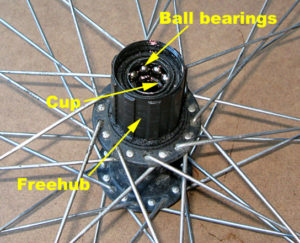
Wheels: Stans Flow EX3 on DT Swiss 350 hub Rear, Stans Flow MK3 on XTR hub Front.
Tires: Maxxis Minion DHF 29×2.5 DH casing front and rear with Cushcore
Seatpost: Fox Transfer 175mm
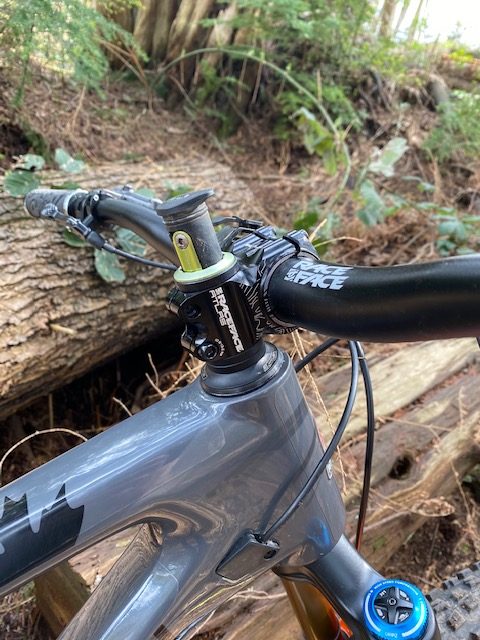
Cockpit: Raceface 35 35mm stem, Atlas 35 bars cut to 800mm. Raceface Strafe grips
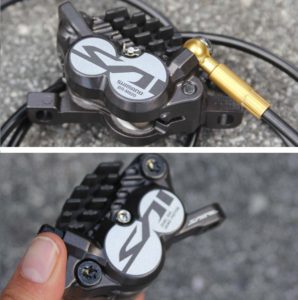
Brakes: Shimano Saint with 203mm Icetech freeza rotors.
Extras: One up EDC and Pump, Tire plugs and punch integrated into the bar ends.
Weight: 38.5lbs without bottle or spare tube.
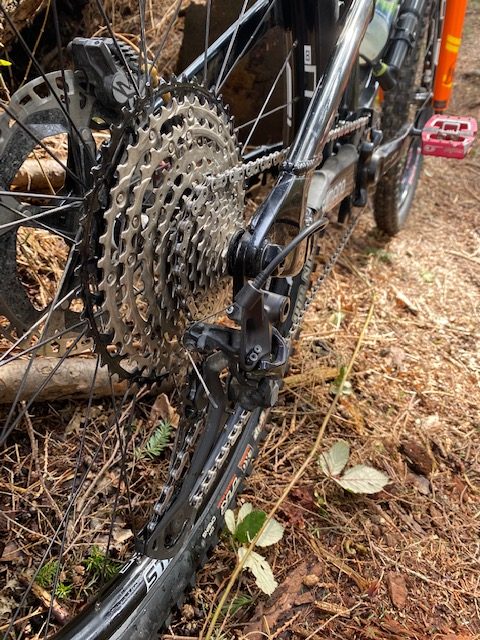
New for 2020, Shimano has released their 12 speed drivetrains. To get the ultimate setup, a balance of weight, reliability, and durability, I went with an SLX cassette, XT shifter and derailleur, and XTR chain. I’ve never been a huge weight weinie, but with the bikes getting so big and hefty, and with all the climbing and ground being covered, I’ve been starting to consider it when building bikes.
The SLX cassette only has one aluminum cog, the 51T at the very top (black). The XT/XTR has the top 3 cogs being made out of aluminum, and the rest being steel or titanium (XTR), meaning the aluminum cogs will wear quicker than the steal/titanium cogs (silver). Most of the climbing is spent in the 2-4th cog from the top, so that’s why I went with the SLX cassette. More steel cogs where a lot of time is spent climing plus it’s a lot cheaper than the XT/XTR cassettes, will give me the balance of performance and durability over time.
The XT derailleur and shifter is the perfect middle ground for reliability, weight savings, and performance. The shifter still has one or two downshifts per press of the lever (compared to only 1 downshift for the SLX), and the derailleur just works. I found that the XTR derailleurs are super light and work really well right out of the box, but are quite finicky as time goes on and require more finer tuned adjustments more often than the XT. I’ve read and heard from multiple sources that if you’re going to spend the money and go XTR with any singe component, its the chain, so I spent the extra money and went with the top of the line chain for smoother shifts and slight weight savings.
Along with the rest of the drivetrain, the cranks were also updated for 2020. In my opinion, cranks provide the least amount of performance in a drivetrain. As long as the chainring is in good shape and nothing is broken or bent, they’ll get you up the hill. I decided not to go with the updated 2020 XT cranks and just buy a 12 speed chainring that was compatible with my existing 11spd cranks to save some money. Lucky Wolf Tooth components developed such a chainring and I have no complaints so far!
Previously I have gone with either a 32T or a 30T chainring on my 29″ Enduro race bikes. I found that I like the way the 30T ring feels overall and how it meshes up with the 11-46 or 11-42 cassettes really well, but I have “topped out” on flat ground or paved surfaces with the small 30T ring. For the 12 speed setup, since I have a massive 51T cog on the rear, I went with a 34T ring on the front to get the ultimate balance of still being able to climb up walls, and still being able to accelerate on flatter or high speed surfaces.
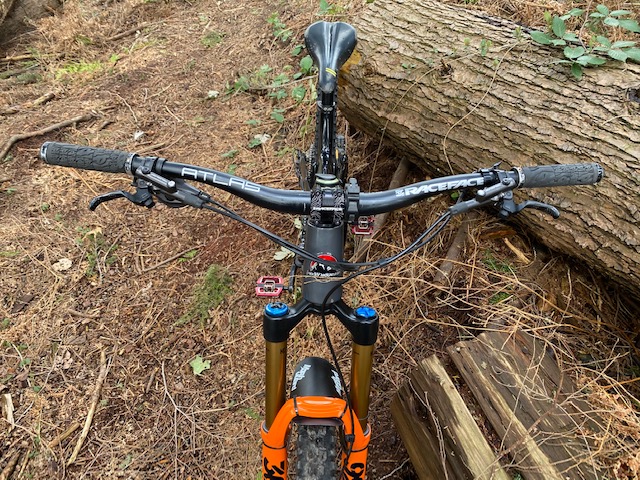
Not much has changed on the cockpit from the past couple of years. Enduro racers have seemed to go quite narrow with their bar widths, usually ranging from 750-780mm. Being 6’3, I’ve felt most comfortable with 800mm width bars. I have ridden 780mm, but found it quite unstable for the limited duration that I’ve ridden with that width. I’ll probably experiment a bit more with narrower bars, since I’ll be able to get through tighter sections easier, but 800mm is still my go to since it’s what I’ve been riding on my DH bikes for such a long time.
Shimano Saint are still my go to brake on every bike I’ve owned since 2013. New XTR/XT brakes have recently come out, and while providing more modulation, haven’t been as overall powerful as the tried and trusted Saints. The brakes haven’t changed at all since 2013, so I am anticipating an update soon, but have absolutely no complaint with the amount, or easily accessible power that these brakes provide.
The One Up EDC tool has been part of my setup since late 2017 and I have no desire to change that anytime soon. The ease of accessibility and convenience of tools are unmatched by any other brand in my opinion. I also have Sahmurai Sword tire plugs in my bar ends.

DH casing tires front and rear
For wheels, I’ve gone with Stans Flow EX3 on the rear, and MK3 on the front with Cushcore inserts. The EX3 is Stans newest DH/Enduro rim and it seems to be holding up very well. I haven’t needed to tension the wheel at all and theres absolutly no dents or any spoke pulling through after some harder impacts. The EX3 is heavier than the MK3 and since front wheels don’t take as much abuse, I decided to stick with the MK3 for the front.
Maxxis Minion DHF’s take care of the grip front and rear. I run 2.5″ width and full DH casing just to be sure that I won’t be breaking rims on those long rough enduro stages. Being 195 lbs I find it to be on the safer side with Cushcore inserts as well. They have definitely helped my confidence on those harsher landings or rough rock sections knowing I won’t be putting dents in my rims. My go to pressure locally is 20/25PSI. Without Cushcore I was running 25/28PSI on average, higher on rougher tracks.
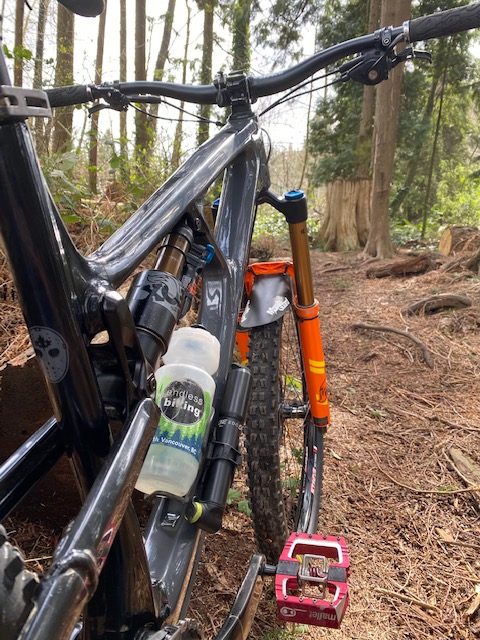
Fox takes care of the suspension and dropper post. I’m running a 36 Grip 2 170mm fork with between 115-130 PSI (still getting used to the new bike). I like a lot of low speed compression to keep my front end up under hard braking and rebound is not too fast, not too slow for the most part. I’ve been experimenting with less high speed compression and air pressure with this new bike since it’s so long and I’ve been having trouble keeping traction on the front tire. I haven’t gotten it totally dialed in yet. The shock is set to 190 PSI with my baseline settings for rebound and compression. I have also been experimenting with volume spacers on this shock because it’s a different bike and actually is designed around a coil shock so it doesn’t require as much progression adjustment via volume spacers. The 175mm Transfer post brings everything together and the bike looks really good with the gold/orange contrast with the black frame!
The only thing I wish I could change on the bike would be the weight. At 38.5 lbs without a bottle or spare tube, that means around 40lbs when I add those things for a race. It is an XL frame with full DH casing plus cushcore, so I can’t expect a super light bike, but it does make pedalling up those steep climbs a bit more of a slog than I’d like. With the way I set up these bikes, I couldn’t expect anything different and it’s only a pound or two heavier than my Instinct BC from the past two seasons. The only way I can lighten up this bike without sacrificing durability is to go to a full XTR drivetrain and carbon bars/wheels. I’m quite happy with my drivetrain and am not willing to shell out 2-3x more money for weight savings, and I think the less carbon on the bike, the better, especially for handlebars and wheels. I’ve seen far too many carbon bars broken in the parking lot, and although all wheels will break, you can finish a race on an alloy rim with a huge dent and a tube, but not on a carbon wheel that’s cracked/shattered. I have seen plenty of that happening. Liftetime warranty is awesome, but won’t help you in the middle of a EWS race.
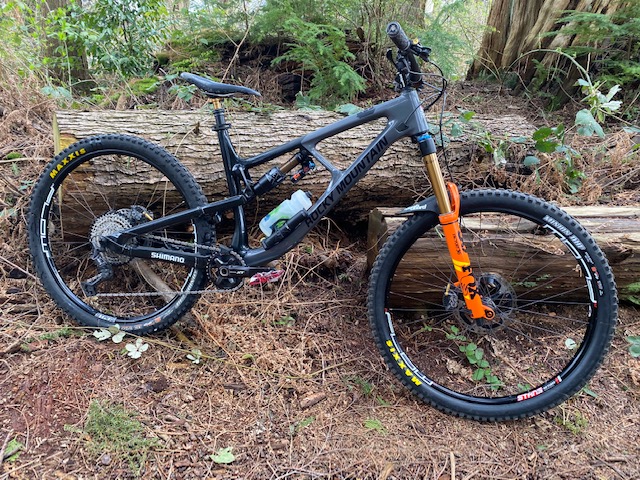
XL Instinct:
Since I wasn’t sure if the Slayer would be a good bike for racing, I was fortunate enough to be able to order two bikes and I chose the Instinct frame as something to fall back on in case I didn’t get along well with the Slayer. I ordered the normal instinct rather than the BC edition because the only difference was the linkage on the BC edition was locked into the lowest and slackest position on the ride 9 chip and the shock was extended from 140mm of travel (210×55 Shock) to 155mm of travel (8.5×2.5 shock). This way I was able to be adaptable and build up a smaller “trail” bike if I did end up keeping the Slayer, which is exactly what I did.

Frame: XL Instinct
Fork: Fox 36 Grip2 150mm 44mm Rake-130PSI
Shock: Fox Float DPS-200PSI
Drivetrain: Shimano XT 11 Speed; 11-42 Cassette, 32T Chainring on 170mm Crank
Wheels: Stans Flow MK3 on Shimano XTR hub Rear, Stans Arch MK3 on XT hub Front
Tires: Maxxis Minion DHF 29×2.5 EXO+ casing front and Minion DHF 29×2.3 DD casing rear
Seatpost: Fox Transfer 175mm
Cockpit: Raceface 35 35mm stem, Atlas 35 bars cut to 800mm. Raceface Strafe grips
Brakes: Shimano Saint with 203mm Icetech freeza rotors.
Extras: One up EDC and Pump, Tire plugs and punch integrated into the bar ends.
Weight: 32.5lbs without bottle or spare tube.
I’ve never had a real trail bike before, something that was built around being light and nimble that I could pedal endlessly. On my first ride, I did a 38.5 km loop hitting the most XC trails I could find on both Fromme and Seymour and had an absolute blast on the uphills, which I usually dread. I’m used to pedalling around big heavy enduro bikes with lots of travel, so it was a lot of fun to build up a bike that was focused more on climbing and adventure rather than downhill smashing. The Rocky Mountain Instinct usually comes with 140/140mm travel, but I decided to up the travel a little bit on the front to 150mm on the Fox 36 that was on my BC edition last year to get a little more confidence on the local descents.
Since going 12 speed requires a different hub or freehub body, I’m sticking with the 11spd Shimano XT setup so I don’t have to buy a new hub. I didn’t like the big jump from the 37T to 46T in the 11-46T cassette, so I ran an 11-42 for most of last year and got along with it well. I’ve swapped between 30T and 32T chainrings depending on the race.
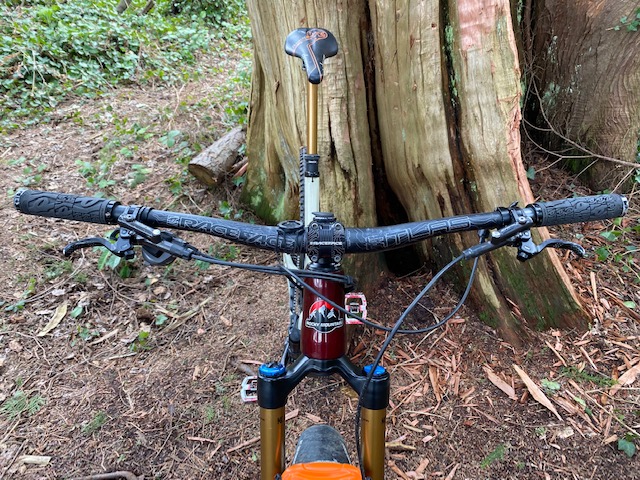
Saint brakes on a light weight trail bike may seem overkill, but they were the only matching pair of brakes I could find. You can never have too much power, right? A goal of mine was to have the cockpit the same on both of my bikes so it was a lot easier to swap between the two, so everything except the shifter is exactly the same on the Instinct as on my Slayer as far as the cockpit goes.
Wheels and tires are where I was able to shave off a lot of weight compared to my Slayer. I’m still running Maxxis Minion DHF’s front and rear, but I have a EXO+ casing 2.5 width on an Arch MK3 rim on the front and a Double Down casing 2.3 width on a Flow MK3 rim on the rear, both without Cushcore.
Since 2017, the only rear shocks I have used have been Fox Float X2 of DHX2 which are used on DH/Enduro bikes. I was a little sceptical going with the Float DPS which has a lot less adjustment than I’m used to, but I’ve been very impressed with the performance both climbing and descending. It’s simple and just works. I don’t expect it to perform as well as a shock with a piggyback on longer descents, but for everything on the shore, I have no complaints!
Both bikes are pretty new to me so I’m still messing around with suspension settings, but I think I’ve got a decent baseline for the style of riding that I’ll be doing on these bikes. Stay tuned for more of a review on both!