Archives For Adventure Bus

Insulating The Bus

March 1, 2020

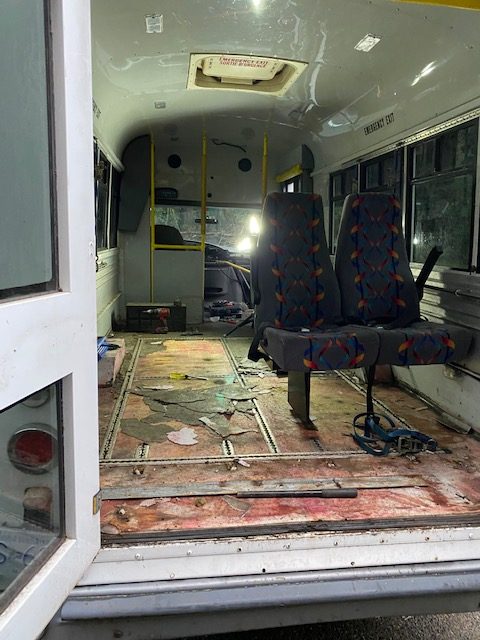
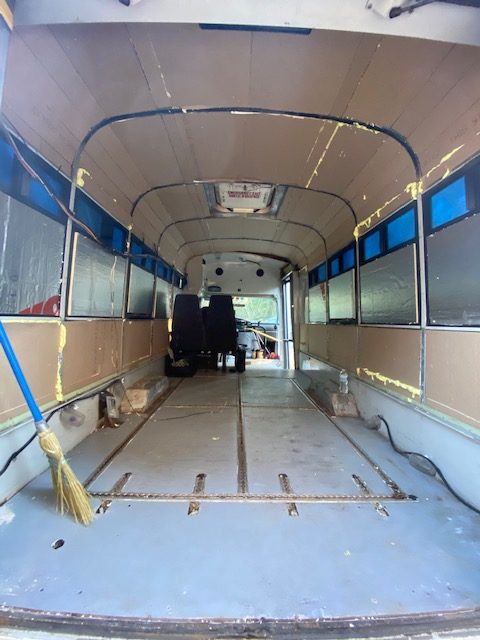
After much researching and debating wether or not I should even bother with insulation, I decided to go for it. Everyone who I had read who hadn’t insulated wished they had, and only one person wished he wouldn’t have insulated at all, but he lived in a very mild, consistant climate. During and after some more insulation of what kind of insulation I should use, I started tearing out the old insulation. A lot of busses have hundreds of rivets holding the roof panels on which need to be removed, which is a huge pain. Luckily, my roof panels were held on by screws, so other than a couple stuck ones that got stripped, they all came out very easily. The wall panels had rivets, so I had my fair share of frustration going through drill bits, but I was so happy I didn’t have to do the same thing on the roof.

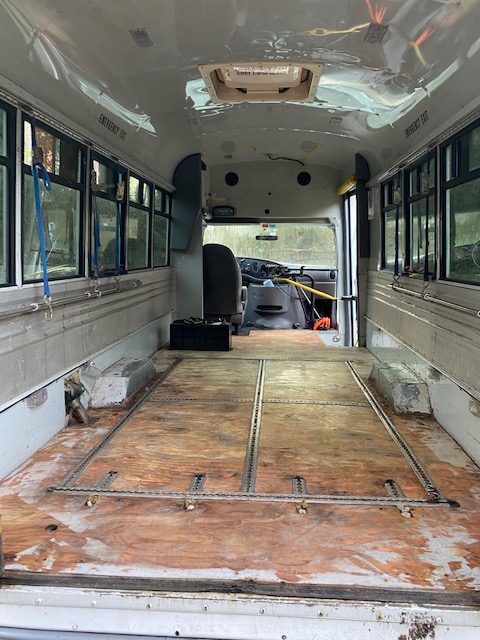
With all the insulation out and walls/roof cleaned up, I started to realize how much condensation occurs when even the thin crappy stock insulation was removed. The roof was dripping everywhere when it was cold outside! I had to put a tarp down on the inside so that It wouldn’t damage the paint on the floor.

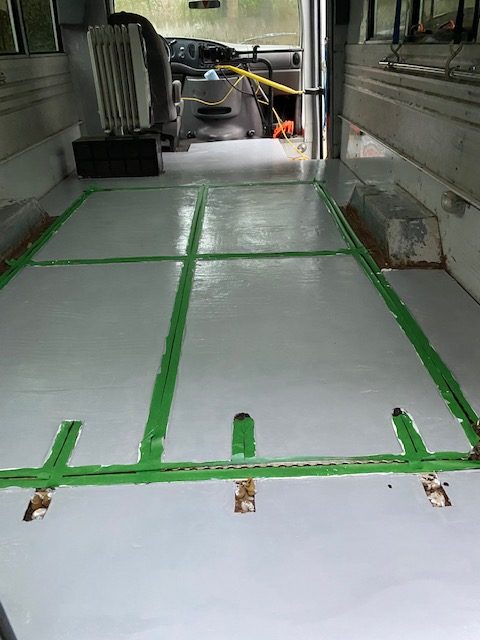
I decided to do things right and spend a little extra money to go with 1.5″ thick polyiso insulation on the roof and walls, and 1″ thick over the lower portion of the windows. After a couple of days of half heartedly doing the walls, I sucked it up and spent a day to do the roof, and it was actually not as hard as I thought it was going to be!

I went and bought some spray foam insulation that was suppose to be good for adhering the foam board to the roof, but I didn’t end up using it unless I cut a bit too short and it wouldn’t pressure fit. I still need to go in and fill in all the cracks with the spray foam, but I’m pretty impressed with how well and easily it came together!

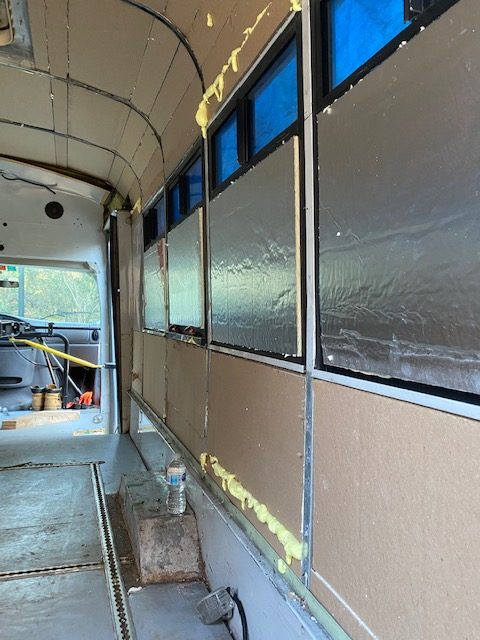
Fortunately on this bus the lower part of the windows aren’t able to open and only the top little section is. That means they are much quieter and I can cover the majority of the heat/cool robbing windows but still have the upper section to open if I want a fresh breeze. I plasti dipped over the lower portion of the window for some stealth and just pressure fitted the insulation.

Next up is fitting the solar panels, wiring, and roof fan before putting up something for walls/roof. I’m still not sure exactly what to cover/finish everything up with so any suggestions would be helpful!

Floor Issues on The Bus

December 27, 2019

Old Flooring Coming up!

If you’ve read my previous post, you’ll know I just purchased an old bus to use as a camper and travel vehicle for racing. I almost immediately started to rip out the old cracked and dirty flooring. It was coming up relatively easily, but leaving a lot of red/pink adhesive that was used to stick it to the plywood flooring underneath. I didn’t think this would be too big of a deal and thought some alcohol or worst case, acetone should clear it up. Oh boy was I wrong.

The adhesive proved to be extremely hard to remove. I went out and got the harshest adhesive strippers I could find, and after multiple coats and lots of scraping, the only results were having an extremely slippery floor, rather than sticky. After spending days trying different chemicals and getting discouraged, thinking I would have to resort to rubbing the floor with a rag until the bare wood revealed itself, my dad suggested I try a grinder with a wire wheel brush. I wasn’t very optimistic, but it turned out that using the grinder was super easy. It was a bit messy, with the adhesive coming up in little clumps and being flung against the walls and anything else that was in the bus, but it was working.

Now that I had the adhesive off, I had to deal with the metal tracks used to secure the wheelchairs. I thought it would be as easy as having someone use a drill with a hex bit up top and me holding a socket to the bolt on the bottom. This ended up not working due to the bolts being on there for almost 20 years. Even with me trying to use the socket to loosen the bolts from underneath was painfully slow, and with over 200 bolts, half being unaccessible from the bottom, I knew that wasn’t going to work either. I experimented with drilling the bolts out from above, and estimated that with the number of bolts there were and accounting for about 2 minutes per bolt, it would take 23 hours to get all of them out. This was extremely discouraging, but I decided to give it a go to see how hard it would actually be to see if it would be worth it. The first two ended up taking over 6 minutes each and I could tell the drill bits were already getting dull. Sure, I could spend some money to get some really good quality bits and a sharpener, but seeing how long it still took made me make the decision to not take out the tracks and work around them.

With that out of the way, I needed to decide what flooring I was going to go with. I originally thought of going with some cheap or leftover roll on vinal floor, but the tracks would make it extremely hard to cut and fit perfectly. Another option was to go with 1′ square vinal sheets which would be a lot easier to cut. This would cost between $100-$200 depending on how cheap I was able to find the material, and probably take a day or so to install based on my limited experience.

Again, my dad made a good suggestion. We started looking into deck primer and paint. It was cheap, would be super easy and quick to apply, and would be durable enough for what I needed. If I ever scratched it up or anything, I could just put more on! I got the paint, and started vacuuming up all the residue from the adhesive. After taping over the parts I didn’t want painted, another bump in the road appeared. It’s now December in Vancouver, and while it’s not cold compared to most other places in the northern hemisphere, its probably colder and a lot more humid than ideal for paint to dry. Armed with two heaters, I decided to go for it anyways.

A coat of primer and two coats of deck paint later, it’s finished! I’ll be keeping a heater on it for a couple days and seeing how dry it gets before I have to move the bus out of the driveway. This was the first thing I did that actually contributed to the build, and it took a lot longer than I thought it would do get here. Guess I shouldn’t expect the rest to go any differently…